Quest'anno il corso capi gita del CAS si svolge in italiano, e quindi non ci si lascia sfuggire l'occasione. Praticamente tutti i partecipanti tranne uno sono del CAS Ticino. Il corso si svolge nell'Oberland Bernese nelle capanne Bächlitalhütte e Lauteraarhütte, tre giorni nella prima e tre nella seconda. Partenza è prevista per la Domenica 13 Luglio dal Grimsel Hospiz. Qui di seguito il racconto di questa bellissima esperienza.
GIORNO I
La meteo non è poi il massimo visto che Domenica piove praticamente in tutta la Svizzera, ma le previsioni danno un netto miglioramento a partire da Martedi'. L'avvicinamento alla Bächlitalhütte avviene sotto una pioggia leggera intermittente, che non dà fastidio piu' di tanto. Arrivati in capanna non si puo' far molto se non aspettare che smetta di piovere per poi andare fuori sotto una parete leggermente strapiombante e provare tutti i nodi, giusto per essere sicuri che tutti siano sullo stesso livello almeno per queste cose. Un commento alla Bächlitalhütte è d'obbligo. Una capanna veramente bella e confortevole. Avendo a disposizione acqua a volontà e molto probabilmente anche una bella turbina la corrente elettrica non manca quindi la capanna è molto ben riscaldata e le luci accese non rappresentano un problema. Inoltre, sembra essere anche un ottimo punto di partenza per gite col le pelli di foca, e visto che l'avvicinamento dura solo un paio d'orette...penso che rimarrà nella mia lista delle cose da fare per questo inverno.
GIORNO I
La meteo non è poi il massimo visto che Domenica piove praticamente in tutta la Svizzera, ma le previsioni danno un netto miglioramento a partire da Martedi'. L'avvicinamento alla Bächlitalhütte avviene sotto una pioggia leggera intermittente, che non dà fastidio piu' di tanto. Arrivati in capanna non si puo' far molto se non aspettare che smetta di piovere per poi andare fuori sotto una parete leggermente strapiombante e provare tutti i nodi, giusto per essere sicuri che tutti siano sullo stesso livello almeno per queste cose. Un commento alla Bächlitalhütte è d'obbligo. Una capanna veramente bella e confortevole. Avendo a disposizione acqua a volontà e molto probabilmente anche una bella turbina la corrente elettrica non manca quindi la capanna è molto ben riscaldata e le luci accese non rappresentano un problema. Inoltre, sembra essere anche un ottimo punto di partenza per gite col le pelli di foca, e visto che l'avvicinamento dura solo un paio d'orette...penso che rimarrà nella mia lista delle cose da fare per questo inverno.
GIORNO II
Il secondo giorno la meteo è ancora un po' incerta e allora invece di andare su per le varie vie d'arrampicata in zona decidiamo di andare a fare un po' di pratica di ancoraggi su neve e ghiaccio, recupero da crepaccio e scivolate su neve...tutte cose che anche in condizioni di tempo non proprio perfette possono sempre essere fatte senza grossi problemi. Alla fine la giornata si rivela molto piena e le due guide non mancano di rivelare un paio di trucchi e astuzie per risparmiare moschettoni. Ad esempio il "barcaiolo infilato" e lo strozzare la fettuccia direttamente sotto la testa della vite da ghiaccio prima di darle gli ultimi due giri. La meteo rimane abbastanza clemente e comincia a piovere esattamente quando rientriamo in capanna...e cominciamo una delle poche sedute di teoria, questa volta su pianificazione di una gita.
GIORNO III
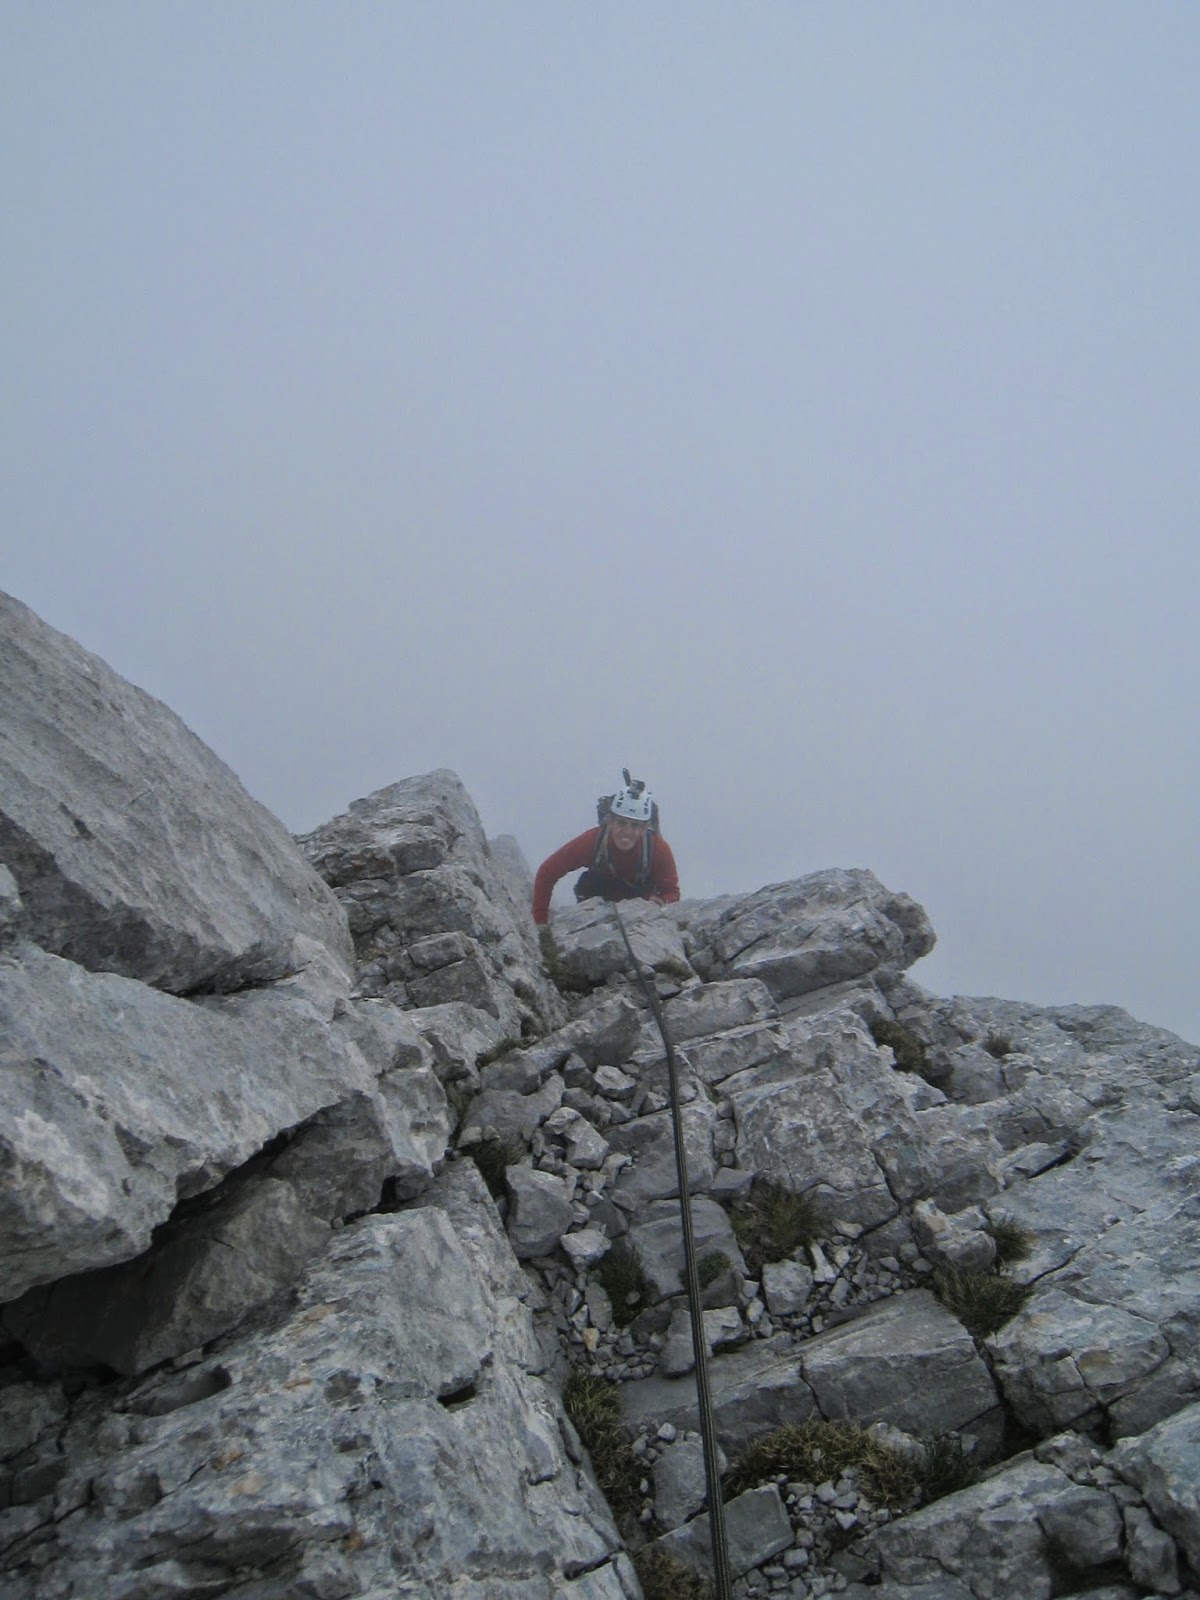
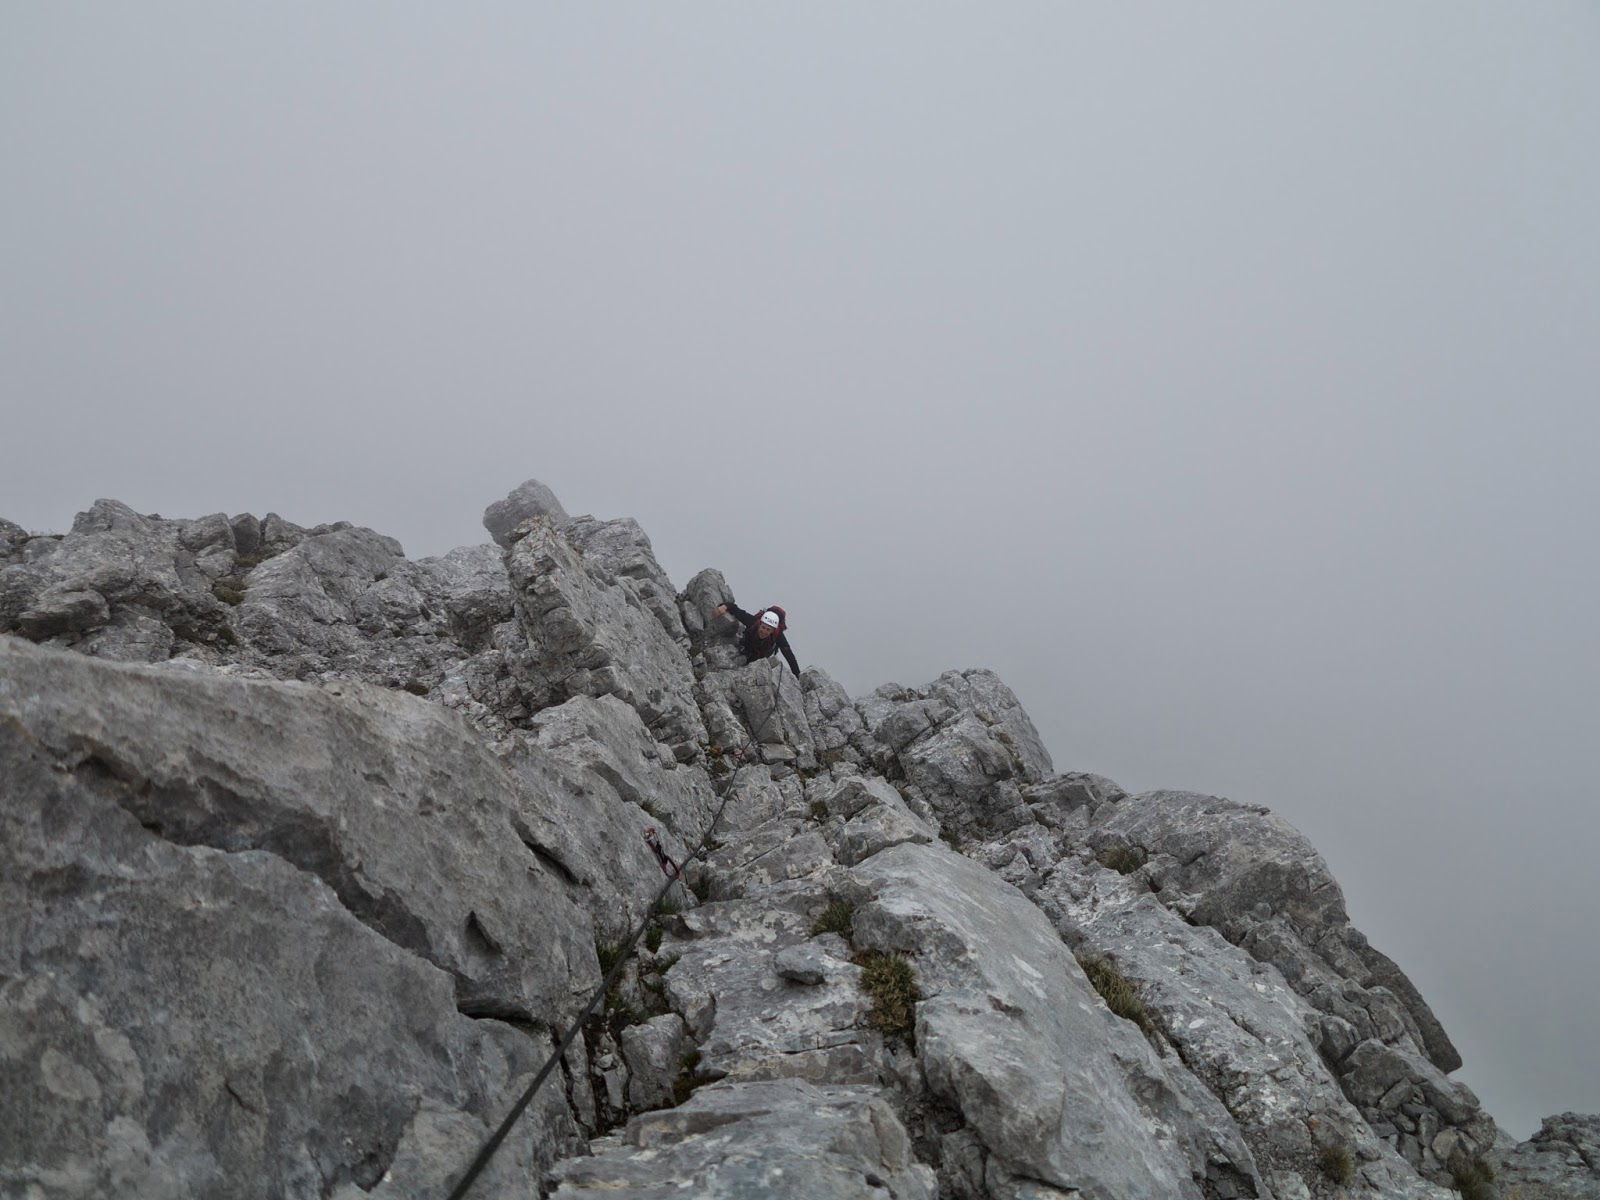
Il terzo giorno si comincia a fare sul serio...veniamo divisi in due gruppi che poi rimarranno sempre gli stessi per motivi di convenienza...5 con una guida (Florian) e 5 con l'altra guida (Patou). Io sono nel gruppo con Florian e la meta di oggi è l'Alplistock. Dalle topografie che abbiamo visto in capanna la sera prima ci aspetta proprio una bella cresta, con tiri fino al IV grado. L'avvicinamento è anche interessante in quanto si deve percorrere un sentierino non sempre evidente e alla fine anche un mezzo canale ancora innevato. All'arrivo in cresta ci si incorda, io sono con Florian, e si parte.
 |
| Canalino per accesso in cresta |
I primi metri fino alla cima Ovest non presentano grosse difficoltà, se non forse un piccolo traverso. Tuttavia sono presenti alcuni chiodi che facilitano il passaggio. Dalla cima Ovest alla cima Est invece...ci sarà di che divertirsi. All'inizio si presenza un bel gendarme con un tiro di 4a in placca per scavalcarlo. Ci sono anche tre chiodi e arrivati su in cima si puo' facilmente integrare con nuts o fettucce. Alla fine le altre due cordate aggireranno il gendarme da entrambi i lati, e in effetti la discesa dal gendarme mi porta esattamente dove gli altri finiscono il traverso. Comunque un gran bel passaggio di arrampicata con appigli sempre presenti, anche se non proprio grandi...soprattutto per i piedi. Incredibile quanto tengono gli scarponi su delle tacchette millimetriche. Il tiro (a dire il vero sono anche piu' di un tiro) chiave si trova a partire dal secondo grande gendarme che va obbligatoriamente salito. Anche questa volta sono il primo a passarci su e non nascondo di essermi un po' preoccupato per la strana assenza di chiodi...in realtà una volta cominciato a scalare si trova un secondo chiodo in mezzo ai due visibili dal basso che rende le cose psicologicamente piu' facili. Dopo questo gendarme c'è un traverso in discesa che definire esposto è poco. Una bellissima serie di traversi su placca che tengono molto alta la tensione, ma che tutti in un modo o nell'altro riescono a fare. Alla fine di questo traverso ci sarà anche una bella discesa a corda doppia da una sosta non proprio in posizione comodissima. A questo punto il percorso sembra staccarsi dalla cresta per procedere lungo il lato Nord. Non so se per fortuna o per sfortuna. Poco piu' avanti lungo la cresta si trova un gendarme spaventosamente bello, letteralmente un dito inquisitorio che sfida chiunque a scalarlo. Florian prova a rientrare in cresta prima del gendarme ma la cosa non sembra possibile. Il traverso a lato della cresta non è proprio piacevole in quanto la roccia non è un granchè...come sempre quando non in cresta...e anche perchè si trova ancora neve da questo lato. Sarà un po' il motto di Florian di restare sempre in cresta!! Alla fine pero' il rientro in cresta è possibile e l'aver trovato ancora dei chiodi ci dice che siamo ancora una volta sulla giusta strada. Qualche altro passaggio in cresta, ancora esposto ma piu' facile di prima, ci porta alla fine di questa bellissima traversata. Tuttavia la discesa non è ancora finita in quanto si dovrà fare ancora una calata, questa volta da 50m, e poi cercare la strada del ritorno in un complicato sistema di cenge. In realtà non era complicato...è solo che abbiamo avuto problemi noi a trovare la strada :)...ma alla fine siamo qui per imparare anche queste cose.


 |
| E qui dove si passa?? |
 |
| Bellissimo gendarme...obbligatorio |
 |
| Minchia se è esposto |
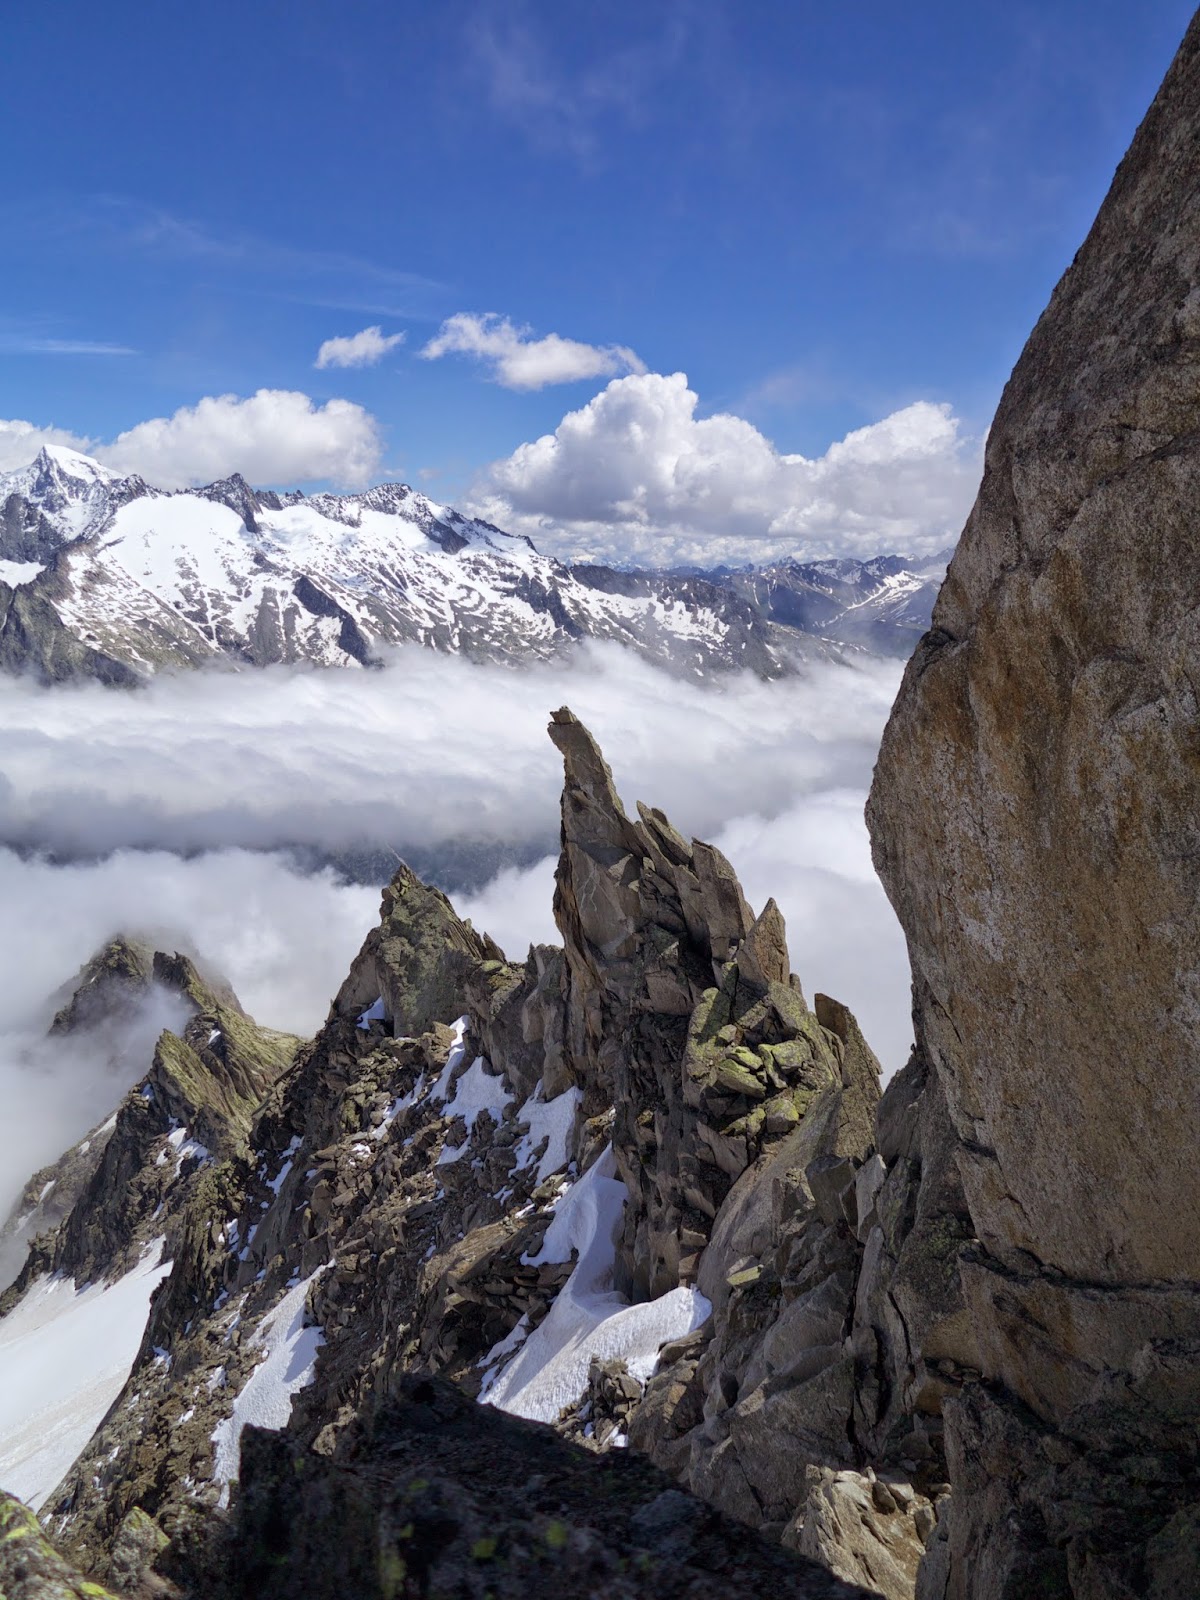 |
| Quel dito inquisitorio mette un po' di paura...noi non lo saliremo |
Come avrete notato la descrizione della via non è nulla di che...ma ci rinuncio a farne una come si deve perchè nonostante avessimo letto due guide diverse e consultate altrettante topografie un bel po' di cose erano "inaspettate" e altre non sono state proprio trovate. Fatto sta, che è un giro che consiglio a tutti!
GIORNO IV
Il giorno seguente il programma prevede lo spostamento alla Lauteraarhütte. Inizialmente si pensava di fare la traversata del Diamantstock prima di andare...il che avrebbe significato un giornatone di quelli che non si scordano. La motivazione che fa cambiare a tutti idea è che, a quanto pare, un gruppo di ben 14 Inglesi ha intenzione di fare la traversata il giorno dopo...e quindi vorrebbe dire trovare belle code nei passaggi chiave, con tanto di biglietto e lista d'attesa con al panificio. Per quanto mi riguarda si sarebbe potuti partire un'ora prima degli altri per evitare tutto cio'...ma l'idea di alzarsi alle 3:00 e di essere in giro per almeno 12 ore non va proprio a genio...per cui si opta per una "semplice" traversata passando dalla Fellenberglücke. La salita lungo in ghiacciaio avviene senza grossi problemi, anche se bisogna fare un po' di attenzione ad evitare qualche crepaccio. Il problema serio è che non tira un filo di vento e il caldo, anche se è ancora relativamente presto, si fa sentire non poco. Per la salita in bocchetta sono ben evidenti delle tracce di pittura bianca sulle rocce. Arrivati su in cima alla bocchetta la vista sull'Oberland Bernese è semplicemente grandiosa! Ma Florian non si perde troppo in chiacchiere e si comincia subito a scendere. Prima si traversa verso sinistra (avendo la bocchetta alle spalle) su una specie di sentiero attrezzato e poi si scende lungo un canalino non troppo ripido...ma dove le rocce vengono giu' come la pioggia a Novembre. Dopo il canalino si traversa ancora sulla sinistra fino a riportarsi sul nevaio. Ancora verso sinistra si traversa fino alla fine del nevaio incontrando una serie di ometti che permettono di trovare un piccolo sentiero. Dal sentiero si sorpassa il salto di roccia sul quale si trova il nevaio e poi si traversa questa volta verso destra (sempre avendo alle spalle la bocchetta) cercando di mantenersi piu' o meno ad una quota costante. Raggiunta poi la base della cresta della cresta del Bächlistock si trovano ancora ometti che indicano un sentiero piu' o meno evidente. Il sentiero scende fino a traversare il Triftbach e poi diventa molto evidente fino in capanna. Insomma niente di troppo tecnico ma una gita che richiede decenti capacità di orientamento e di lettura della carta.
Arrivati in capanna ci si dedica ad un po' di relax e perchè no...anche ad un paio di corte vie d'arrampicata appena fuori dalla capanna.

GIORNO V
Oggi l'obiettivo non è fare roba troppo tecnica, ma piu' che altro lungo e con itinerario non proprio ovvio. Il nome di questa cima non l'imparero' mai...Scheuchzerhorn. Si parte poco dopo le 4:30, quindi per la prima volta dall'inizio della settimana cone le pile frontali accese. E questa è cosa molto buona. La cosa brutta è che si comincia la gita andando verso il basso...eh si, perchè bisogna scendere fin sul ghiacciaio Unteraargletscher tramite una serie che sembra quasi infinita di scale metalliche. Arrivati sul ghiacciaio si punta al fiume che scende dal ghiacciaio proprio sotto la nostra cima. All'inizio, avendo alle spalle la capanna, ci si tiene sulla sinistra e poi intorno ai 2400m, appena il fiume si allarga un po', lo si attraversa. Da questo punto si trova anche una traccia di sentiero con qualche ometto che punta alle piccole cascate piu' in fondo nella valletta. Qui si volge verso la destra (sempre avendo la capanna alle spalle) e si sale per la via piu' facile...che dipende dalle condizioni. Nel nostro caso c'era ancora della neve e quindi seguirla rendeva la salita abbastanza confortevole. In assenza di neve trovare una via attraverso le placchette puo' non essere evidente, ma comunque non difficile. Una volta raggiunto il ghiaccio ci si porta sotto al cresta che scende dalla cima e si risale fino ad incontrare un evidente canale abbastanza ripido. Se ancora nelle giuste condizioni è possibile usare questo canale per risalire in cresta. Nel nostro caso le condizioni erano buone se non fosse per l'uscita dove una cornice di neve ha presentato qualche piccolo problema. In mancanza delle giuste condizioni si puo' seguire la via descritta per la discesa. Raggiunta la cresta il panorama diventa molto piu' bello e finalmente si esce da quella conca che cominciava ad assumere le sembianze di un forno non ventilato. Il percorso di qui in poi non presenta difficoltà in termini di orientamento, ma il tratto finale di cresta potrebbe risultare un po' stretto se non si è abituati. Per fortuna la neve tiene abbastanza bene quasi ovunque ma ogni tanto un bell'affondo fino al ginocchio non fa male...La discesa la si fà dapprima scendendo direttamente verso sud e poi voltando ad est. Una calata su di un sasso è necessaria per oltrepassare un saltino di neve. Percorrendo il ghiacciaio si arriva alla bocchetta dello Scheuchzerjoch e di li' si segue ancora il ghiacciao, poi nevaio, fino a ritrovare le tracce della salita. Tutto procede bene in discesa se non fosse per le scalette (tante...forse troppe) che dopo una lunga giornata vanno ancora risalite prima di poter tornare in capanna.

GIORNO VI
Ultimo giorno, e si torna a fare qualcosa di tecnico in cresta, anche se sappiamo fin da principio che questa cresta non sarà tanto difficile come quella che abbiamo affrontato sull' Alplistock. Il programma è di fare l'Hinderstock dalla cresta Ovest, anche non si sa se arriveremo fino alla cima centrale a 3307 o ci fermeremo prima su quella a 3306 (io sono ingegnere per cui per me quelle due cime sono alte uguali...). Si procede dapprima sul sentiero che sale su verso il Rothoren e poi, raggiunta la base della parete si volta a sinistra seguendo la traccia di sentiero (anche ben marcata). A causa dell'abbondante innevamento cominciamo a trovare neve fin da subito non appena si super la parete del Rothoren. All'inizio si scavano scalini con la picca e poi ci si rende conto che i ramponi sarebbero comunque serviti dopo...e allora si calzano direttamente. L'obiettivo ora è la cresta davanti a noi. La vecchia via di salita andava un po' sulla destra fino andare a prendere il punto piu' basso della cresta stessa. Tuttavia a causa di un crollo questa via non è piu' frequentabile e si opta per la variante che passa per la Hubellücke. Il terreno man mano che ci si avvicina comincia a farsi piu' ripido e incordarsi sarebbe potuta essere una buona idea (almeno cosi' ci dirà Florian piu' tardi). L'ultimo tratto su roccia è aiutato da una scaletta, anzi due. Alla fine della seconda pero' la cosa è un po' sketchy come direbbero gli inglesi in quanto tutto coperto di neve che non tiene un granchè. Per fortuna Florian ci precede e ci assicura tutti dall'alto. Da qui, dopo aver costeggiato la cresta sulla neve ed aver attraversato un terminale, si ricomincia l'arrampicata in cresta. Mai troppo difficile ma una paio di passaggini in aderenza ci sono e ci si diverte. Trovare la via anche non è un problema...basta rimanere in cresta. Arrivati in cima ci si gode l'ultimo panorama dall'alto di questa bellissima settimana, niente vento, niente nuvole ma solo tanto sole. Poi si ridiscende seguendo la cresta del Rothoren, attraversando un molto poco stabile pendio nevoso visto l'orario e la forza del sole, fino a raggiungere un punto di calata da 50m che riporta sulla conca nevosa. Anche questa molto poco stabile e con piccolissime valanghe bagnate che vengono giu' ad ogni passo...ma per fortuna la pendenza non è tanta e la cosa non è pericolosa. Arrivati in territorio sicuro, ovvero su di un grosso sasso, ci si riorganizza, si tolgono imbrago, ramponi e quant'altro e si torna in capanna.
Qui ci si gode un ottimo aperitivo a base di vino bianco, prosciutto e formaggio per festeggiare il fatto che siamo tutti da ora in poi capigita ufficiali del CAS!!
GIORNO IV
Il giorno seguente il programma prevede lo spostamento alla Lauteraarhütte. Inizialmente si pensava di fare la traversata del Diamantstock prima di andare...il che avrebbe significato un giornatone di quelli che non si scordano. La motivazione che fa cambiare a tutti idea è che, a quanto pare, un gruppo di ben 14 Inglesi ha intenzione di fare la traversata il giorno dopo...e quindi vorrebbe dire trovare belle code nei passaggi chiave, con tanto di biglietto e lista d'attesa con al panificio. Per quanto mi riguarda si sarebbe potuti partire un'ora prima degli altri per evitare tutto cio'...ma l'idea di alzarsi alle 3:00 e di essere in giro per almeno 12 ore non va proprio a genio...per cui si opta per una "semplice" traversata passando dalla Fellenberglücke. La salita lungo in ghiacciaio avviene senza grossi problemi, anche se bisogna fare un po' di attenzione ad evitare qualche crepaccio. Il problema serio è che non tira un filo di vento e il caldo, anche se è ancora relativamente presto, si fa sentire non poco. Per la salita in bocchetta sono ben evidenti delle tracce di pittura bianca sulle rocce. Arrivati su in cima alla bocchetta la vista sull'Oberland Bernese è semplicemente grandiosa! Ma Florian non si perde troppo in chiacchiere e si comincia subito a scendere. Prima si traversa verso sinistra (avendo la bocchetta alle spalle) su una specie di sentiero attrezzato e poi si scende lungo un canalino non troppo ripido...ma dove le rocce vengono giu' come la pioggia a Novembre. Dopo il canalino si traversa ancora sulla sinistra fino a riportarsi sul nevaio. Ancora verso sinistra si traversa fino alla fine del nevaio incontrando una serie di ometti che permettono di trovare un piccolo sentiero. Dal sentiero si sorpassa il salto di roccia sul quale si trova il nevaio e poi si traversa questa volta verso destra (sempre avendo alle spalle la bocchetta) cercando di mantenersi piu' o meno ad una quota costante. Raggiunta poi la base della cresta della cresta del Bächlistock si trovano ancora ometti che indicano un sentiero piu' o meno evidente. Il sentiero scende fino a traversare il Triftbach e poi diventa molto evidente fino in capanna. Insomma niente di troppo tecnico ma una gita che richiede decenti capacità di orientamento e di lettura della carta.
Arrivati in capanna ci si dedica ad un po' di relax e perchè no...anche ad un paio di corte vie d'arrampicata appena fuori dalla capanna.
 |
| Ancora una meteo da cartolina |
 |
| Cosa c'è di meglio per rilassarsi in capanna che un po' di arrampicata? |
GIORNO V
Oggi l'obiettivo non è fare roba troppo tecnica, ma piu' che altro lungo e con itinerario non proprio ovvio. Il nome di questa cima non l'imparero' mai...Scheuchzerhorn. Si parte poco dopo le 4:30, quindi per la prima volta dall'inizio della settimana cone le pile frontali accese. E questa è cosa molto buona. La cosa brutta è che si comincia la gita andando verso il basso...eh si, perchè bisogna scendere fin sul ghiacciaio Unteraargletscher tramite una serie che sembra quasi infinita di scale metalliche. Arrivati sul ghiacciaio si punta al fiume che scende dal ghiacciaio proprio sotto la nostra cima. All'inizio, avendo alle spalle la capanna, ci si tiene sulla sinistra e poi intorno ai 2400m, appena il fiume si allarga un po', lo si attraversa. Da questo punto si trova anche una traccia di sentiero con qualche ometto che punta alle piccole cascate piu' in fondo nella valletta. Qui si volge verso la destra (sempre avendo la capanna alle spalle) e si sale per la via piu' facile...che dipende dalle condizioni. Nel nostro caso c'era ancora della neve e quindi seguirla rendeva la salita abbastanza confortevole. In assenza di neve trovare una via attraverso le placchette puo' non essere evidente, ma comunque non difficile. Una volta raggiunto il ghiaccio ci si porta sotto al cresta che scende dalla cima e si risale fino ad incontrare un evidente canale abbastanza ripido. Se ancora nelle giuste condizioni è possibile usare questo canale per risalire in cresta. Nel nostro caso le condizioni erano buone se non fosse per l'uscita dove una cornice di neve ha presentato qualche piccolo problema. In mancanza delle giuste condizioni si puo' seguire la via descritta per la discesa. Raggiunta la cresta il panorama diventa molto piu' bello e finalmente si esce da quella conca che cominciava ad assumere le sembianze di un forno non ventilato. Il percorso di qui in poi non presenta difficoltà in termini di orientamento, ma il tratto finale di cresta potrebbe risultare un po' stretto se non si è abituati. Per fortuna la neve tiene abbastanza bene quasi ovunque ma ogni tanto un bell'affondo fino al ginocchio non fa male...La discesa la si fà dapprima scendendo direttamente verso sud e poi voltando ad est. Una calata su di un sasso è necessaria per oltrepassare un saltino di neve. Percorrendo il ghiacciaio si arriva alla bocchetta dello Scheuchzerjoch e di li' si segue ancora il ghiacciao, poi nevaio, fino a ritrovare le tracce della salita. Tutto procede bene in discesa se non fosse per le scalette (tante...forse troppe) che dopo una lunga giornata vanno ancora risalite prima di poter tornare in capanna.
 |
| Paesaggi stupendi |
 |
| Lauteraarhütte |
GIORNO VI
Ultimo giorno, e si torna a fare qualcosa di tecnico in cresta, anche se sappiamo fin da principio che questa cresta non sarà tanto difficile come quella che abbiamo affrontato sull' Alplistock. Il programma è di fare l'Hinderstock dalla cresta Ovest, anche non si sa se arriveremo fino alla cima centrale a 3307 o ci fermeremo prima su quella a 3306 (io sono ingegnere per cui per me quelle due cime sono alte uguali...). Si procede dapprima sul sentiero che sale su verso il Rothoren e poi, raggiunta la base della parete si volta a sinistra seguendo la traccia di sentiero (anche ben marcata). A causa dell'abbondante innevamento cominciamo a trovare neve fin da subito non appena si super la parete del Rothoren. All'inizio si scavano scalini con la picca e poi ci si rende conto che i ramponi sarebbero comunque serviti dopo...e allora si calzano direttamente. L'obiettivo ora è la cresta davanti a noi. La vecchia via di salita andava un po' sulla destra fino andare a prendere il punto piu' basso della cresta stessa. Tuttavia a causa di un crollo questa via non è piu' frequentabile e si opta per la variante che passa per la Hubellücke. Il terreno man mano che ci si avvicina comincia a farsi piu' ripido e incordarsi sarebbe potuta essere una buona idea (almeno cosi' ci dirà Florian piu' tardi). L'ultimo tratto su roccia è aiutato da una scaletta, anzi due. Alla fine della seconda pero' la cosa è un po' sketchy come direbbero gli inglesi in quanto tutto coperto di neve che non tiene un granchè. Per fortuna Florian ci precede e ci assicura tutti dall'alto. Da qui, dopo aver costeggiato la cresta sulla neve ed aver attraversato un terminale, si ricomincia l'arrampicata in cresta. Mai troppo difficile ma una paio di passaggini in aderenza ci sono e ci si diverte. Trovare la via anche non è un problema...basta rimanere in cresta. Arrivati in cima ci si gode l'ultimo panorama dall'alto di questa bellissima settimana, niente vento, niente nuvole ma solo tanto sole. Poi si ridiscende seguendo la cresta del Rothoren, attraversando un molto poco stabile pendio nevoso visto l'orario e la forza del sole, fino a raggiungere un punto di calata da 50m che riporta sulla conca nevosa. Anche questa molto poco stabile e con piccolissime valanghe bagnate che vengono giu' ad ogni passo...ma per fortuna la pendenza non è tanta e la cosa non è pericolosa. Arrivati in territorio sicuro, ovvero su di un grosso sasso, ci si riorganizza, si tolgono imbrago, ramponi e quant'altro e si torna in capanna.
 |
| Scaletta |
 |
| Il terminale |
 |
| La cresta a tratti è molto facile |
 |
| Sempre ottima arrampicata |
Qui ci si gode un ottimo aperitivo a base di vino bianco, prosciutto e formaggio per festeggiare il fatto che siamo tutti da ora in poi capigita ufficiali del CAS!!
 |
| Complimenti a tutti i neo-capigita!! |